Deploying Workflows to a New Server
There are a few different reasons why you may need to move a Workflow (GXWF) from one server to another. On the professional services team we frequently develop Workflows in our own development environment, migrating them to the client environment once they’ve been built and tested. Another common scenario is having two ArcGIS portal instances - one for development and one for production (and possibly others for test and QA). Workflows developed on one portal need to be copied up to the other when promoting to production.
Even when you have only one portal instance (on-prem Portal or AGOL) that you use for both development and production, you often need to overwrite your production Workflow with your development Workflow. This post will give you some ideas about how to do that.
The most straightforward way of copying a Workflow to another server is to export it using Workflow designer, then import it when you’ve connected to the target Workflow designer. This automatically takes care of updating the Workflow license and server URL (for server-side Workflows). This is almost always the best way to perform an initial Workflow migration, when there is no existing Workflow on the target server that you’re using already.
What happens though when you have a Workflow already in production (or UAT even) and you just want to push some changes you’ve made in a dev Workflow? If you follow the export/import sequence you will end up with another copy of the Workflow in your target environment, with a new URL. To get your production (or UAT) application to use this new URL you will also need to update the application configuration, requiring more steps and causing disruption. You also need to remember to clean up the old Workflow when you’re done to avoid having old copies lying around. It’s much cleaner to overwrite the existing version with the new changes.
There is a post I did earlier about how Workflows are stored - I’d encourage you to read through that if you haven’t already. This post sort of assumes you’ve got a decent handle on all of that.
I’ll start with a simple case - a client-side Workflow with no custom activities. The steps we’re going to follow are:
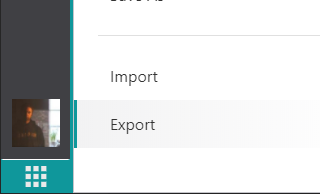
- Export the Workflow
- Using ago-assistant, replace the item data in the target portal
- Open up the Workflow in the target designer to automatically update the license URL
Export the Workflow
You can export the Workflow in a couple of ways. You can use the Export option in Workflow designer:
or you can use ago-assistant to copy the item data instead. The two methods will give you the same result, but the ago-assistant method will format your JSON for you automatically which is nice.
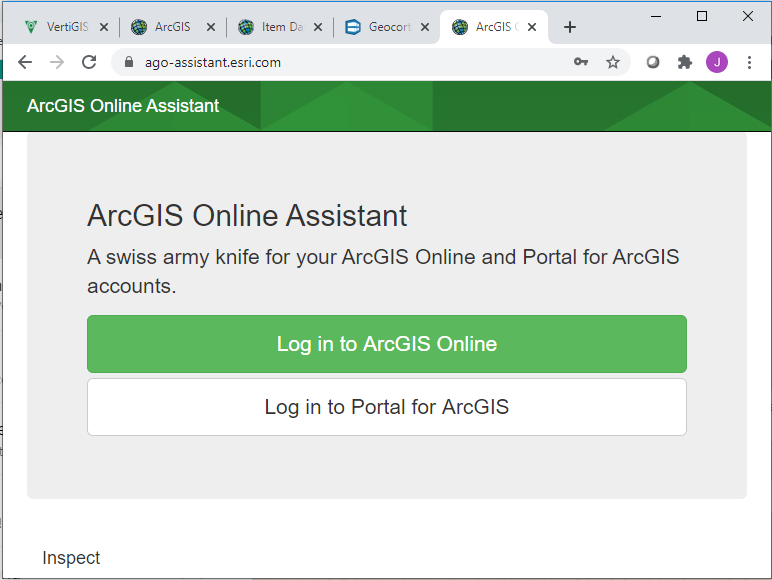
The Workflow export method gives you a JSON file that you download - you will need to open that JSON file in a text editor and copy all the content to your clipboard. The ago-assistant method isn’t as common but it’s handy. First, launch ago-assistant and log in to your portal where the source Workflow lives.
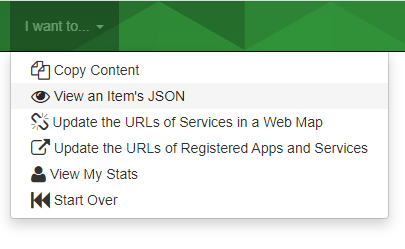
Then, choose View an Item's JSON from the ‘I want to…’ menu (I like that ‘I want to…’ menu idea, wonder where they came up with that? :)
Find the Workflow in the left-hand panel and click on it. If you have lots of items you can use the search bar.
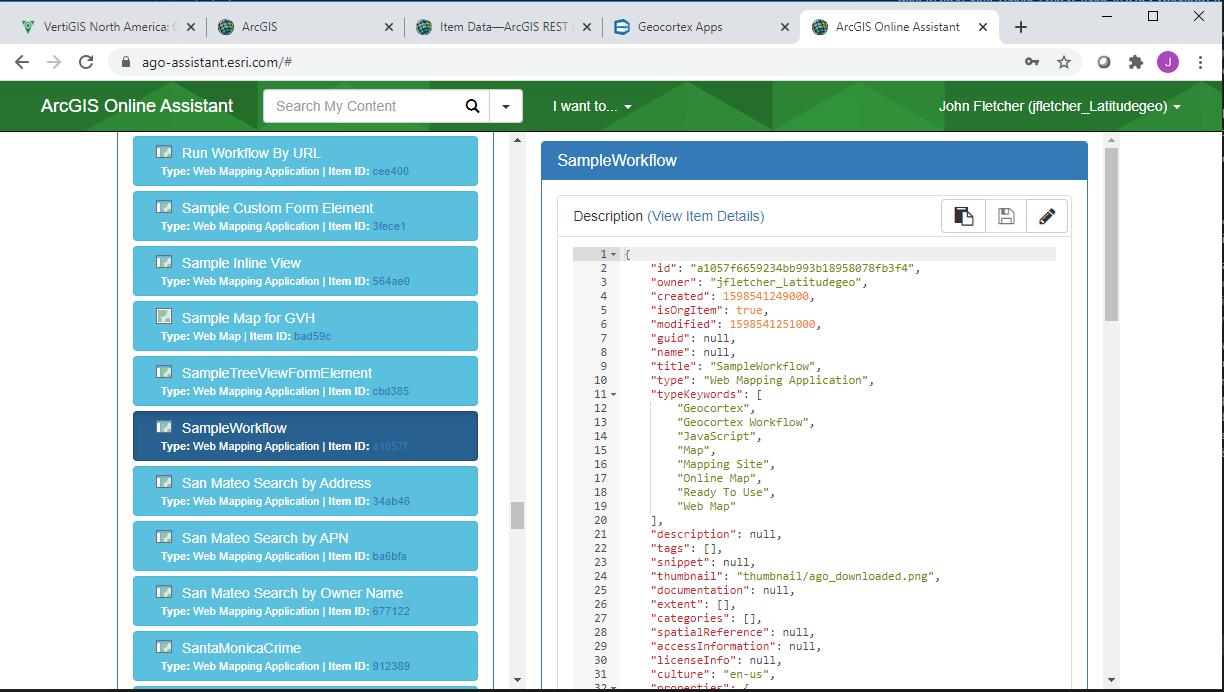
Scroll down to the Data section in the right panel and click Copy JSON
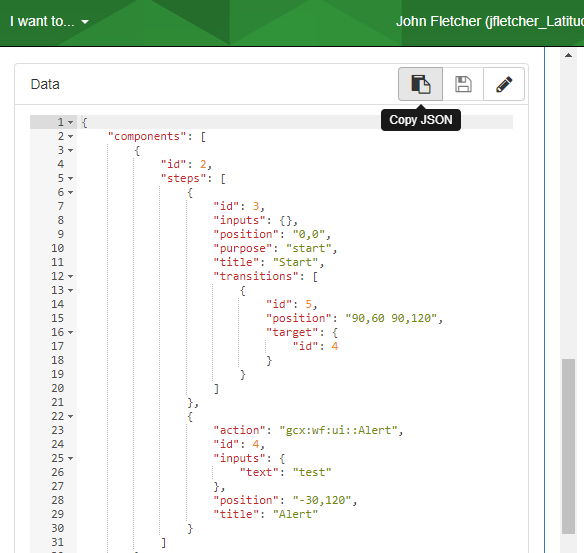
At this point you have the Workflow in your clipboard and can copy it over the old Workflow. On to the next step.
Replace the Item Data
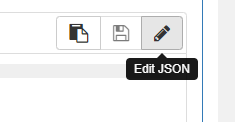
When you save a client-side Workflow in GXWF Designer, Designer updates the item data directly in portal. This is what we need to simulate using ago-assistant, just applying the edits to a different item. Back in ago-assistant, log in to the target portal - the one that hosts the Workflow you want to replace. Just like before, choose View an Item's JSON from the ‘I want to…’ menu and select your target Workflow from the list on the left. Scroll down to the Data section in the right panel (again like before) but this time click Edit JSON.
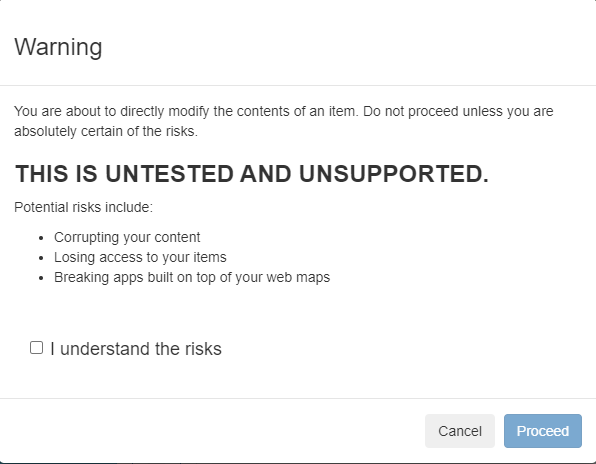
If this is the first time doing this, you will get a warning message from ago-assistant. At this point you should have a backup copy of that Workflow you’re overwriting…if not, copy the existing item data and make that backup copy now!
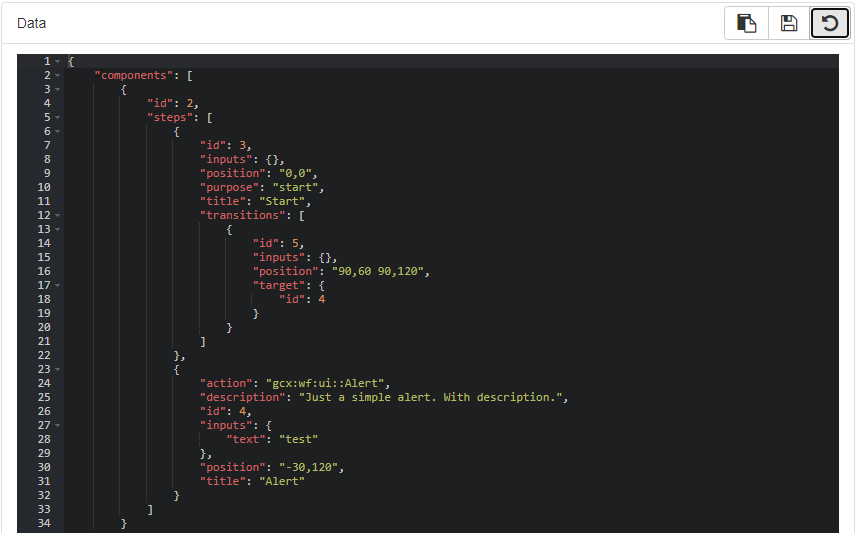
You will now be in edit mode in ago-assistant. Here you can directly edit the JSON by typing right in the browser (dangerous, but handy), or do a wholesale select-all and paste your edited Workflow content (dangerous, but handy :). If you make a mistake or change your mind you can hit the button to revert. When you’re done, click the save button and the item data will be instantly updated.
Update the License
If you look right at the bottom of the Workflow’s item data JSON you will notice a license info section. When you use GXWF Designer this section is automatically kept up to date. In the case of on-prem Workflow, the license info section will have the URL of the on-prem Designer’s license endpoint. If you’ve migrated the Workflow to a new server this license URL will be incorrect. This could cause problems for end users of your Workflows who may see a ‘you need to license Workflow!’ message. Unpleasant.
There is a very easy solution to this - open the Workflow in GXWF Designer on the target server and save. You don’t need to make any changes, just Ctrl-S will do. GXWF will automatically update the license information in the Workflow and you’re good to go.
Here is a screenshot of the license info for my on-prem Workflow. If you use SaaS Workflow your license will just be a string id.

Demystifying Things
There’s a chance that ago-assistant won’t be around forever. There’s also an off chance that portal could change how it stores things, so it’s nice to understand what’s going on so you can adjust accordingly. All GXWF Designer and ago-assistant are doing is taking advantage of the portal REST API. The main endpoints of interest are the one to get the item (the Workflow metadata), the one to get the item data (the Workflow itself), and the one to update the item. You can use these endpoints to update items in portal using Postman or a similar tool, bypassing ago-assistant altogether. You will need a token for many of these operations so understanding that process can be useful too.
Comments
There are no comments for this article.
Join the discussion for this article on this ticket. Comments appear on this page instantly.
GitHub issue commenting system taken from this post by aristath.